

How To Change To Current In Rvm
Introduction
Blood-red is a popular open up-source programming linguistic communication focusing on simplicity and efficiency. The language serves as the basis of the Ruby-red on Rails framework and is used for full general-purpose programming, data analysis, and spider web applications.
In this tutorial, nosotros provide a stride-by-step guide to installing Cerise using the official repositories and 3rd-political party tools.

Prerequisites
- A system running Ubuntu 20.04 (learn how to Install Ubuntu xx.04 Focal Fossa)
- A user account with sudo privileges
- Access to the terminal window or command line
Install Ruddy via Ubuntu Repository
Using the congenital-in apt packet managing director offers the fastest and easiest way to install Scarlet on Ubuntu:
1. Update the system repositories with:
sudo apt update ii. Utilize the post-obit command to install Ruby:
sudo apt install carmine-full 3. When prompted, type Y and printing Enter to confirm the installation.
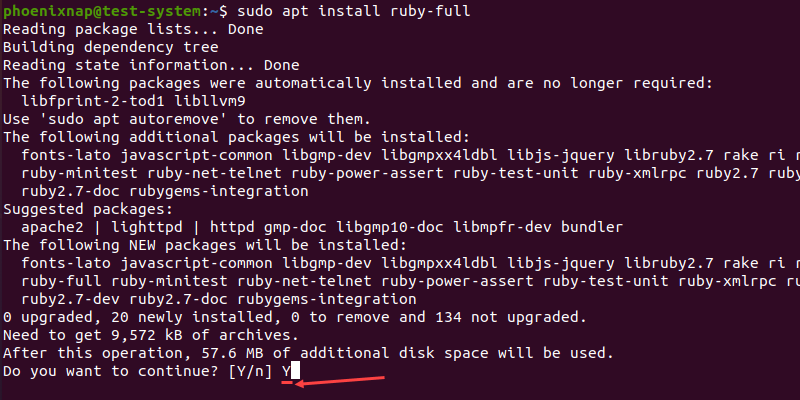
4. Once the installation is complete, verify information technology by checking the current version of Ruby:
blood-red --version 
Install Blood-red Using Rbenv
Rbenv is a command line tool that lets you lot switch betwixt installed versions of Ruby. Information technology can also install new versions of Ruby using the blood-red-build plugin.
Step 1: Download Updates and Dependencies
one. Start by updating the system repositories:
sudo apt update 2. Download and install the libraries and compilers Cerise needs to run:
sudo apt install git curlicue autoconf bison build-essential libssl-dev libyaml-dev libreadline6-dev zlib1g-dev libncurses5-dev libffi-dev libgdbm6 libgdbm-dev libdb-dev three. Type Y and press Enter to confirm the installation.
Pace ii: Install Rbenv
1. Download and run the trounce script used to install Rbenv:
curl -fsSL https://github.com/rbenv/rbenv-installer/raw/HEAD/bin/rbenv-installer | bash 2. You need to add $HOME/.rbenv/bin to your PATH surroundings variable to start using Rbenv.
Employ the post-obit commands if yous are using the Fustigate vanquish:
echo 'consign PATH="$HOME/.rbenv/bin:$PATH"' >> ~/.bashrc repeat 'eval "$(rbenv init -)"' >> ~/.bashrc source ~/.bashrc For the Zsh vanquish, use:
echo 'consign PATH="$HOME/.rbenv/bin:$PATH"' >> ~/.zshrc repeat 'eval "$(rbenv init -)"' >> ~/.zshrc source ~/.zshrc 3. Verify the installation by checking the version of Rbenv:
rbenv -five 
Footstep 3: Install Reddish
1. List all of the versions of Crimson bachelor for installation through Rbenv with:
rbenv install -l 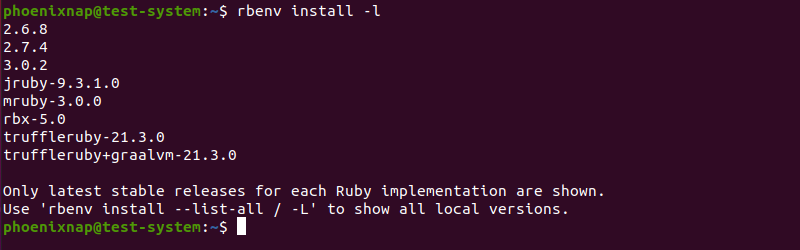
2. Select a version of Blood-red and install it using:
rbenv install [version number] In this case, we are installing Scarlet 3.0.2:
rbenv install 3.0.2 
Note: Installing Ruby using Rbenv might have some time. If you want the control output to list each step of the installation process, enable the verbose output by adding the --verbose flag: rbenv install --verbose [version number] .
3. Set up the newly installed version of Crimson equally the global version:
rbenv global [version number] For this case:
rbenv global 3.0.two four. Verify the installation by checking the electric current version of Ruby-red:
carmine --version 
Install Cerise Using RVM
RVM is a command line tool that helps you install and manage multiple Ruby environments on the same system.
Pace 1: Download Updates and Dependencies
1. Update the system repositories past using:
sudo apt update 2. Download and install dependencies Ruby needs to run properly:
sudo apt install whorl g++ gcc autoconf automake bison libc6-dev libffi-dev libgdbm-dev libncurses5-dev libsqlite3-dev libtool libyaml-dev brand pkg-config sqlite3 zlib1g-dev libgmp-dev libreadline-dev libssl-dev 3. Type Y and printing Enter to ostend the installation when prompted.
Step ii: Install RVM
1. Add together the GPG key used to verify the RVM installation file:
gpg --keyserver hkp://pgp.mit.edu --recv-keys 409B6B1796C275462A1703113804BB82D39DC0E3 7D2BAF1CF37B13E2069D6956105BD0E739499BDB 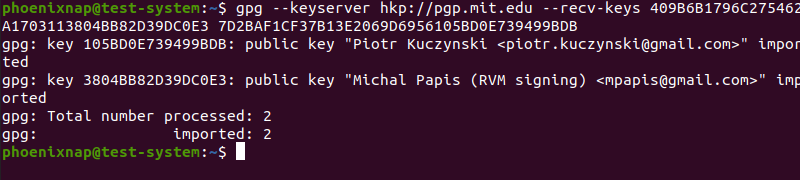
2. Download and install RVM using the installation script:
roll -sSL https://become.rvm.io | bash -due south stable 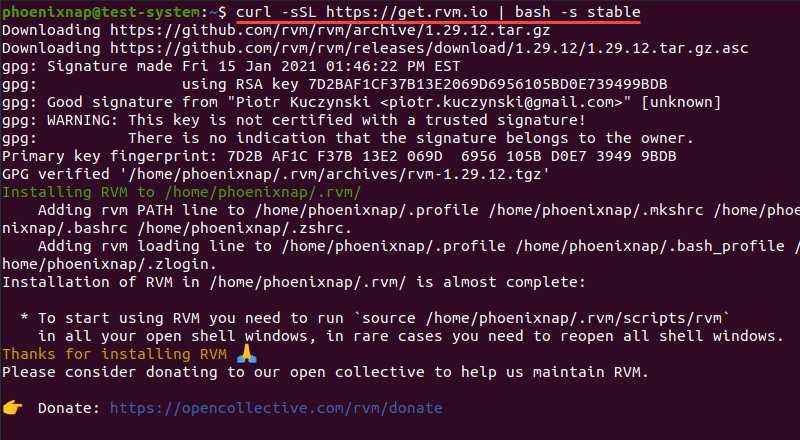
3. Load the RVM script environment variables using the source control:
source ~/.rvm/scripts/rvm Step 3: Install Crimson
1. List all versions of Ruby available through RVM:
rvm listing known 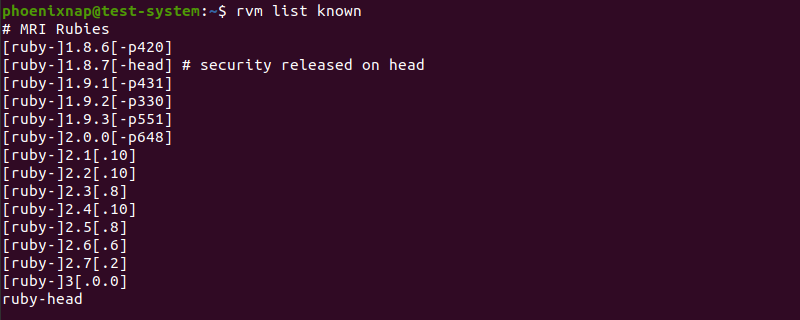
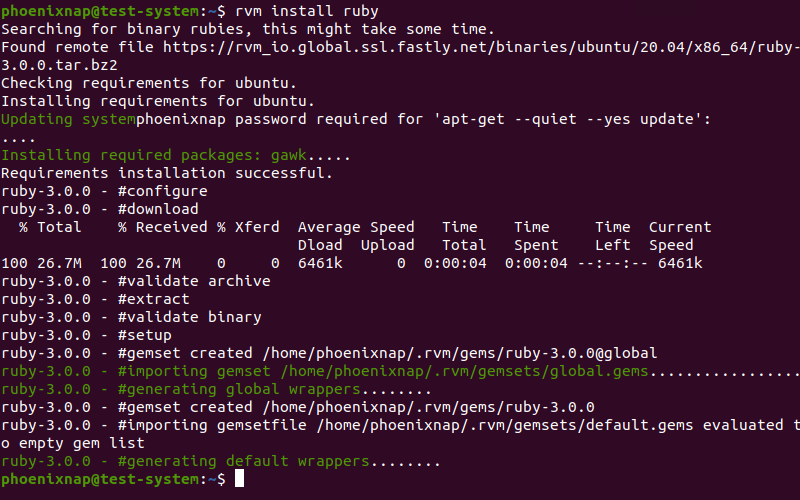
2. Select a version of Reddish and install it using the following syntax:
rvm install blood-red-[version number] Omitting the version number installs the latest stable version of Ruby:
rvm install ruddy 3. When prompted, enter your ambassador password and press Enter to proceed.
4. Fix the new version of Ruddy every bit the default:
rvm --default employ cherry-red-[version number] In this example, we are using the default choice without the version number:
rvm --default use red 
five. Verify the Red installation by checking the current version:
reddish --version 
Conclusion
After following this tutorial, you should accept a copy of Cerise installed and set up to utilise. Next, you may want to install the Ruby on Rails stack, which should help simplify and speed up app evolution.
Was this article helpful?
Yep No

How To Change To Current In Rvm,
Source: https://phoenixnap.com/kb/install-ruby-ubuntu
Posted by: richardsonreepris1964.blogspot.com
0 Response to "How To Change To Current In Rvm"
Post a Comment